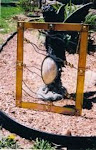
Occasionally it's fun to etch an image onto glass, this can be done as a stand alone ornament (as shown here) or it can also be used in a stained glass panel simply by foiling or leading around the etching and adding to a stained glass design.
Etching is fairly simple. You can use a photograph, as shown, or simply draw your design freehand. Even with a photograph you will find that while it's helpful for outlining your subject and placement of features, the underlying photo will be consistantly covered with glass dust. With that being said, it's often easier for me to use the photo as a guide for creating the initial sketch, but performing the details of the piece freehand. You will also want to work with a dark piece of fabric, a piece of dark construction paper or other dark material under the piece of glass so that you may easily be able to see what you are drawing.
A few safety concerns, you will want to use a dust mask while working with etching, particularly if you will be using an electric etching tool. Some people have devised methods of a water drip or dust collectors to remove the glass particles from the work areas.
I use a Dremel tool with a flex shaft attachment to etch with. Google www.Dremel.com for more information regarding the attachments and supplies you can purchase. There are a variety of tools that will do the job, from hand scribes to dental drills. It's another interesting and fun way to dabble with glass. So grab a piece of glass and etch away..you never know it could be habit forming!
One good site to learn more about etching is this one: www.lesleypyke.com
Ms. Pyke creates very outstanding art on glass and her site holds a wealth of knowledge. She may also be found on Facebook.